


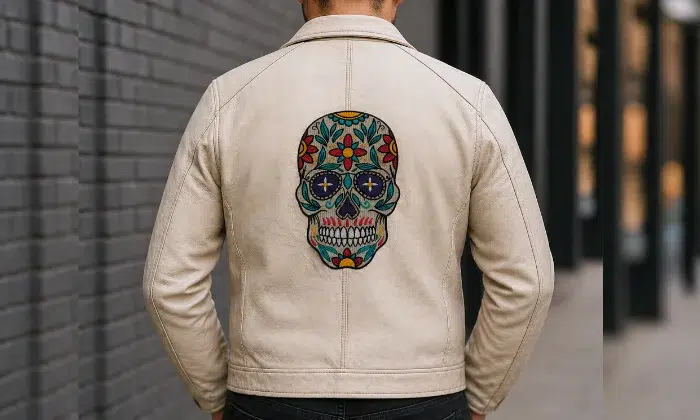
Digitize Jacket Back Embroidery Designs
Big designs. Bold impact. Zero room for mistakes.
That’s what jacket back embroidery is all about.
If you’ve ever tried to digitize a large back design, you already know—it’s very different from small logos. One small mistake can ruin the whole piece.
In this guide, you’ll learn how to digitize jacket back embroidery designs the right way, with simple steps and practical tips you can actually use.
Why Jacket Back Designs Are Different
Jacket back designs are not your average embroidery projects.
They are:
- Large in size (often 8–14 inches wide)
- High in stitch count
- More visible, so flaws stand out
- Stitched on thicker materials
This means your digitizing approach must be smarter and more controlled.
Key Elements of Jacket Back Digitizing
Before you start, understand these essentials:
1. Design Size Matters
Large designs need careful planning.
- Break the design into sections
- Avoid stitching everything in one direction
- Maintain balance across the entire layout
Think of it like building a wall—you do it brick by brick, not all at once.
2. Stitch Density Control
Too much density can ruin large designs.
- Use medium to low density for fills
- Avoid overpacking stitches
- Let the fabric breathe
Large designs with high density can become stiff and heavy.
3. Proper Underlay Strategy
Underlay is your foundation.
For jacket backs:
- Use edge run + zigzag underlay
- Add support for large fill areas
- Prevent fabric shifting
A strong base keeps everything clean and stable.
Step-by-Step: Digitize Jacket Back Embroidery Designs
Step 1: Prepare the Artwork
Start with a clean, high-quality design.
- Use vector files if possible
- Simplify small details
- Adjust proportions for large format
Clarity is everything at this stage.
Step 2: Plan the Stitch Sequence
Sequence matters more than you think.
- Stitch from center outward
- Minimize jumps and trims
- Group similar colors
Good sequencing reduces production time and errors.
Step 3: Choose the Right Stitch Types
Use a mix of stitches for better results:
- Tatami (fill stitch) for large areas
- Satin stitch for borders and text
- Run stitch for fine details
Each stitch type has a purpose—use it wisely.
Step 4: Set Stitch Direction
Direction affects the final look.
- Alternate stitch angles in large fills
- Follow the shape of the design
- Avoid long, continuous stitches in one direction
This improves texture and reduces fabric pull.
Step 5: Manage Push and Pull Compensation
Large designs are more sensitive to distortion.
- Add pull compensation to columns
- Adjust shapes slightly before stitching
- Test and refine
Without this, your design may look uneven.
Step 6: Test the Design
Never skip testing.
Run a sample stitch on similar fabric and check:
- Alignment
- Stitch quality
- Thread tension
- Overall look
Fix issues before final production.
Best Fabric and Stabilizer Choices
Jacket backs are usually stitched on:
- Denim
- Leather
- Polyester blends
Stabilizer Tips
- Use heavy cut-away stabilizer
- Consider double layering for large designs
- Hoop tightly but carefully
A strong foundation prevents shifting and puckering.
Common Mistakes to Avoid
When you digitize jacket back embroidery designs, avoid these:
- Using high stitch density
- Ignoring stitch direction
- Poor sequencing
- Skipping underlay
- Not testing the design
These mistakes can waste time, thread, and materials.
Pro Tips from Absolute Digitizing
At Absolute Digitizing, we’ve worked on countless large-format embroidery designs.
Here are a few expert insights:
- Break large fills into smaller sections
- Use different stitch angles for depth
- Keep designs balanced visually and structurally
- Avoid long stitch runs that can snag
- Always test on actual jacket material
Big designs require patience—but the results are worth it.
Real-Life Example (Simple Analogy)
Think of jacket back embroidery like painting a mural.
You don’t rush it.
You plan sections, layer colors, and step back often to check the overall look.
Digitizing works the same way—careful planning leads to stunning results.
Conclusion
Learning how to digitize jacket back embroidery designs is a game-changer if you want to create bold, professional pieces.
Focus on planning, control your stitch density, use proper underlay, and always test your work.
With the right approach, you can turn large designs into clean, eye-catching embroidery that stands out.
FAQs
1. What size is a typical jacket back embroidery design?
Most designs range between 8 to 14 inches wide, depending on the jacket size.
2. Why is stitch density lower for large designs?
Lower density prevents stiffness, thread breaks, and fabric distortion in big designs.
3. What stabilizer is best for jacket backs?
Heavy cut-away stabilizer is the best choice for stability and durability.
4. How long does it take to digitize a jacket back design?
It can take several hours depending on complexity and size.
5. Can beginners digitize large embroidery designs?
Yes, but it requires practice, patience, and proper understanding of digitizing basics.
